Getting Started for android
Integration Guide
Version Requirements
| minSDKVersion | targetSDKVersion | compileSDKVersion | buildToolsVersion |
|---|---|---|---|
| 15 | 25 | 25 | 25.0.2 |
Gradle based projects
Add the following dependencies to your build.gradle file inside the depencencies
section.
dependencies {
    compile 'com.android.support:appcompat-v7:25.3.1'
    compile 'com.android.support:design:25.3.1'
    compile 'com.android.support:cardview-v7:25.3.1'
    compile 'com.android.support:recyclerview-v7:25.3.1'

    // Retrofit
    compile 'com.squareup.retrofit2:retrofit:2.1.0'
    compile 'com.squareup.retrofit2:converter-gson:2.1.0'
    compile 'com.squareup.retrofit2:adapter-rxjava:2.0.1'
    compile 'com.squareup.okhttp3:logging-interceptor:3.8.0'

    // rx
    compile 'io.reactivex:rxandroid:1.1.0'
    compile 'io.reactivex:rxjava:1.1.6'
    compile 'com.jakewharton.rxbinding:rxbinding:0.4.0'

    // glide
    compile 'com.github.bumptech.glide:glide:3.7.0'

    // UI Generic progressbar
    compile 'me.zhanghai.android.materialprogressbar:library:1.4.1'
}
SDK Configuration

Save entelliosdk.aar file to local drive and then you can import a local aar file via the File>New>New Module>Import .JAR/.AAR Package option in Android Studio. Open module settings and then go to dependencies and add module dependency.
Manifest Configuration
Add following permissions in Manifest
<uses-permission android:name="android.permission.INTERNET"/>
<uses-permission android:name="android.permission.RECORD_AUDIO"/>
<uses-permission android:name="android.permission.ACCESS_NETWORK_STATE"/>
Add following activities in Manifest
<activity
    android:name="com.techm.entellio.chat.ChatActivity"
    android:screenOrientation="portrait"
    android:theme="@style/Theme.AppCompat.Light.NoActionBar"
    android:windowSoftInputMode="stateHidden|adjustResize"></activity>
<activity
    android:name="com.techm.entelliosdk.faq.activity.FAQActivity"
    android:name="@style/Theme.AppCompat.Light.NoActionBar"
    android:screenOrientation="portrait"></activity>
<activity
    android:name="com.techm.entelliosdk.aboutus.AboutUsActivity"
    android:name="@style/Theme.AppCompat.Light.NoActionBar"
    android:screenOrientation="portrait"></activity>
<activity
    android:name="com.techm.entelliosdk.settings.activity.SettingsActivity"
    android:name="@style/Theme.AppCompat.Light.NoActionBar"
    android:screenOrientation="portrait"></activity>
<activity
    android:name="com.techm.entelliosdk.settings.activity.ChatbotListActivity"
    android:name="@style/Theme.AppCompat.Light.NoActionBar"
    android:screenOrientation="portrait"></activity>
Resource Configuration
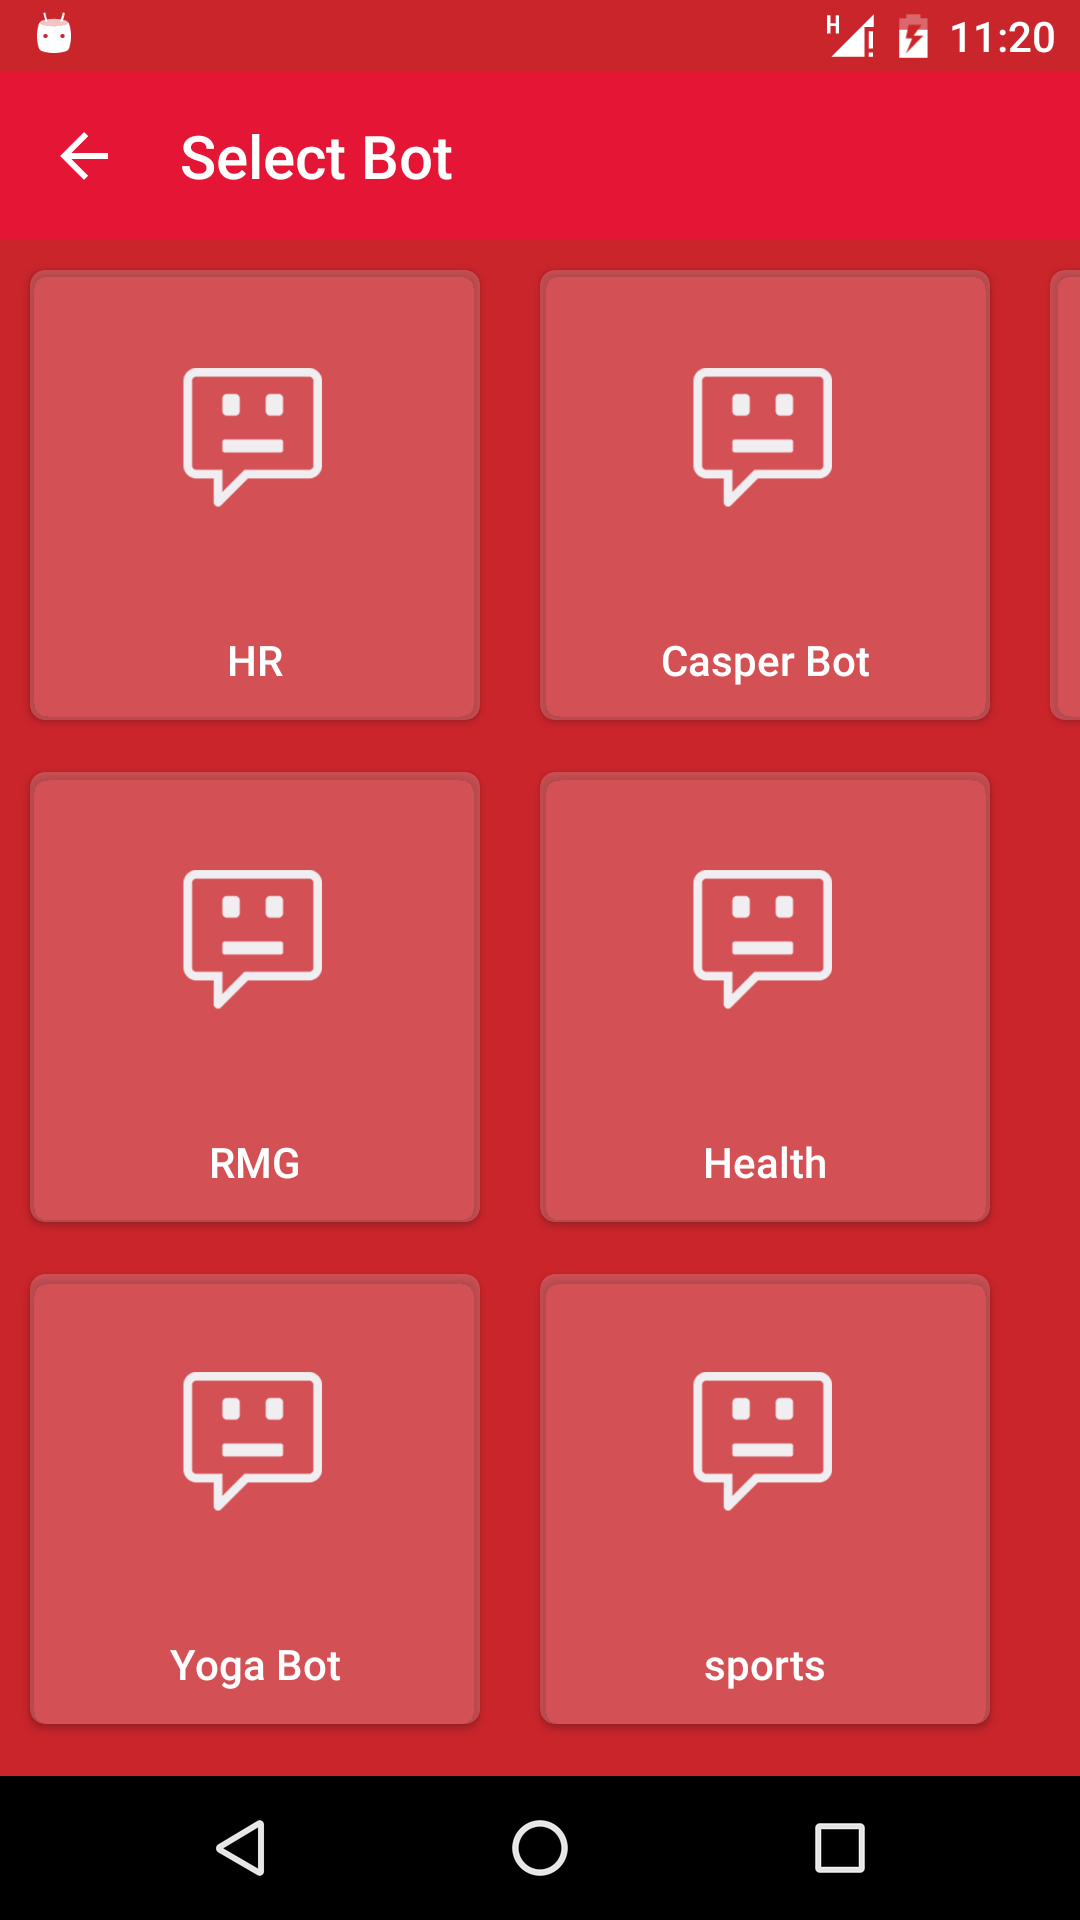
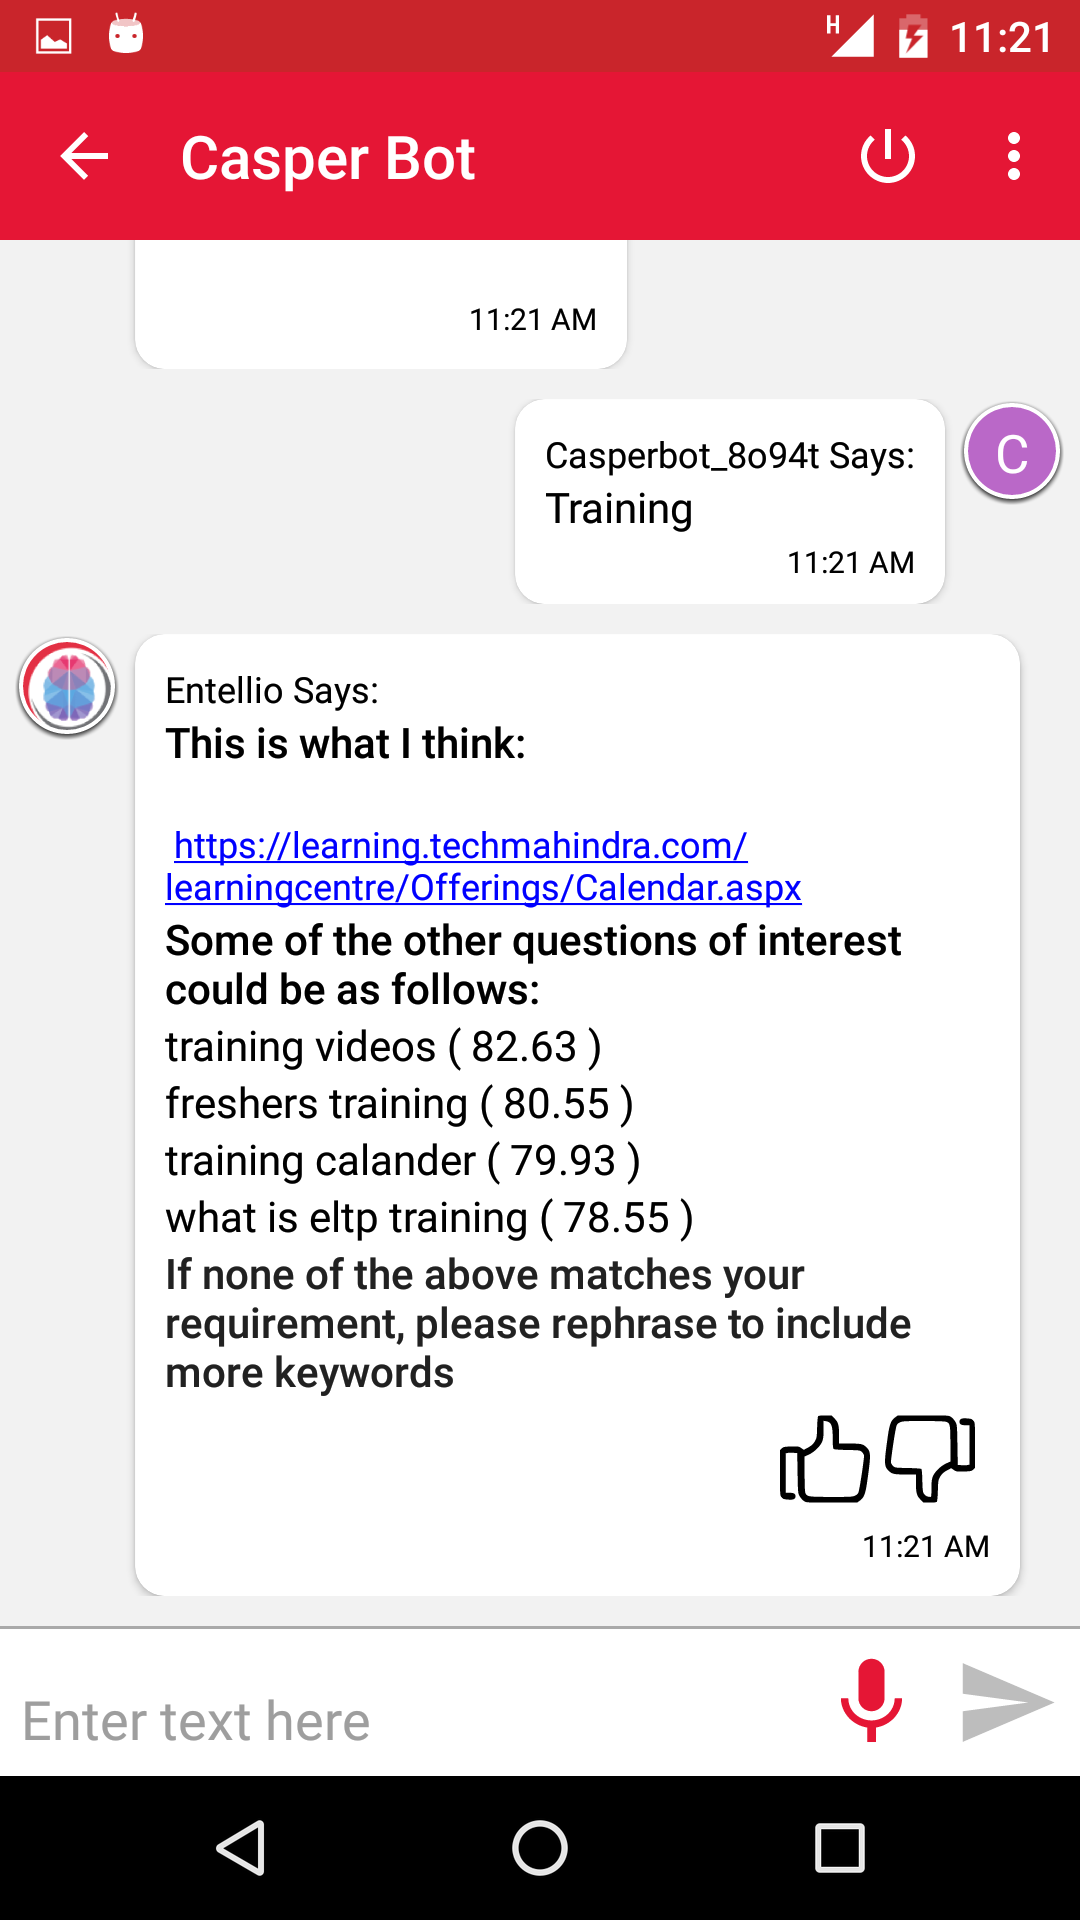
strings.xml<string name="base_url">YOUR BASE URL</string> (e.g. http://entellio.techmahindra.com/) <string name="help_menu1">FAQ</string> <string-array name="faq_help_menu1"> <item>Who can become an expert?</item> <item>How can I ask a Question in ATE forum?</item> <item>How to raise request for business cards?</item> <item>Who are eligible to apply for business cards?</item> <item>Whom can we reach for any clarifications on business cards?</item> <item>Am I eligible for shift allowance?</item> <item>Am I eligible for weekend working allowance?</item> <item>Why is goal setting link disabled for me?</item> <item>I want a authorized HR letter with change of address</item> <item>Need letter for Home Loan Account conversion from NRI to RI.</item> <item>how can I update my pan card details?</item> <item>Where do I need to update Passport details ?</item> </string-array>
<color name="send_button_pressed">#BDBDBD</color>
<color name="send_button_normal">@color/colorPrimary</color>

<color name="audio_record_button_pressed">#BDBDBD</color>
<color name="audio_record_button_normal">@color/colorPrimary</color>
Add PreferenceHelper.onCreate(this);inonCreate()of your application class. public class EntellioApplication extends Application { @Override public void onCreate() { super.onCreate(); PreferenceHelper.onCreate(this); } }
if (PreferenceHelper.IS_LOGGED_IN) {
    Entellio.goToChatScreen(SplashScreenActivity.this, ,<USERNAME>);
} else {
    Entellio. goToChatBotListScreen (SplashScreenActivity.this);
}
Add following files in drawables folder.
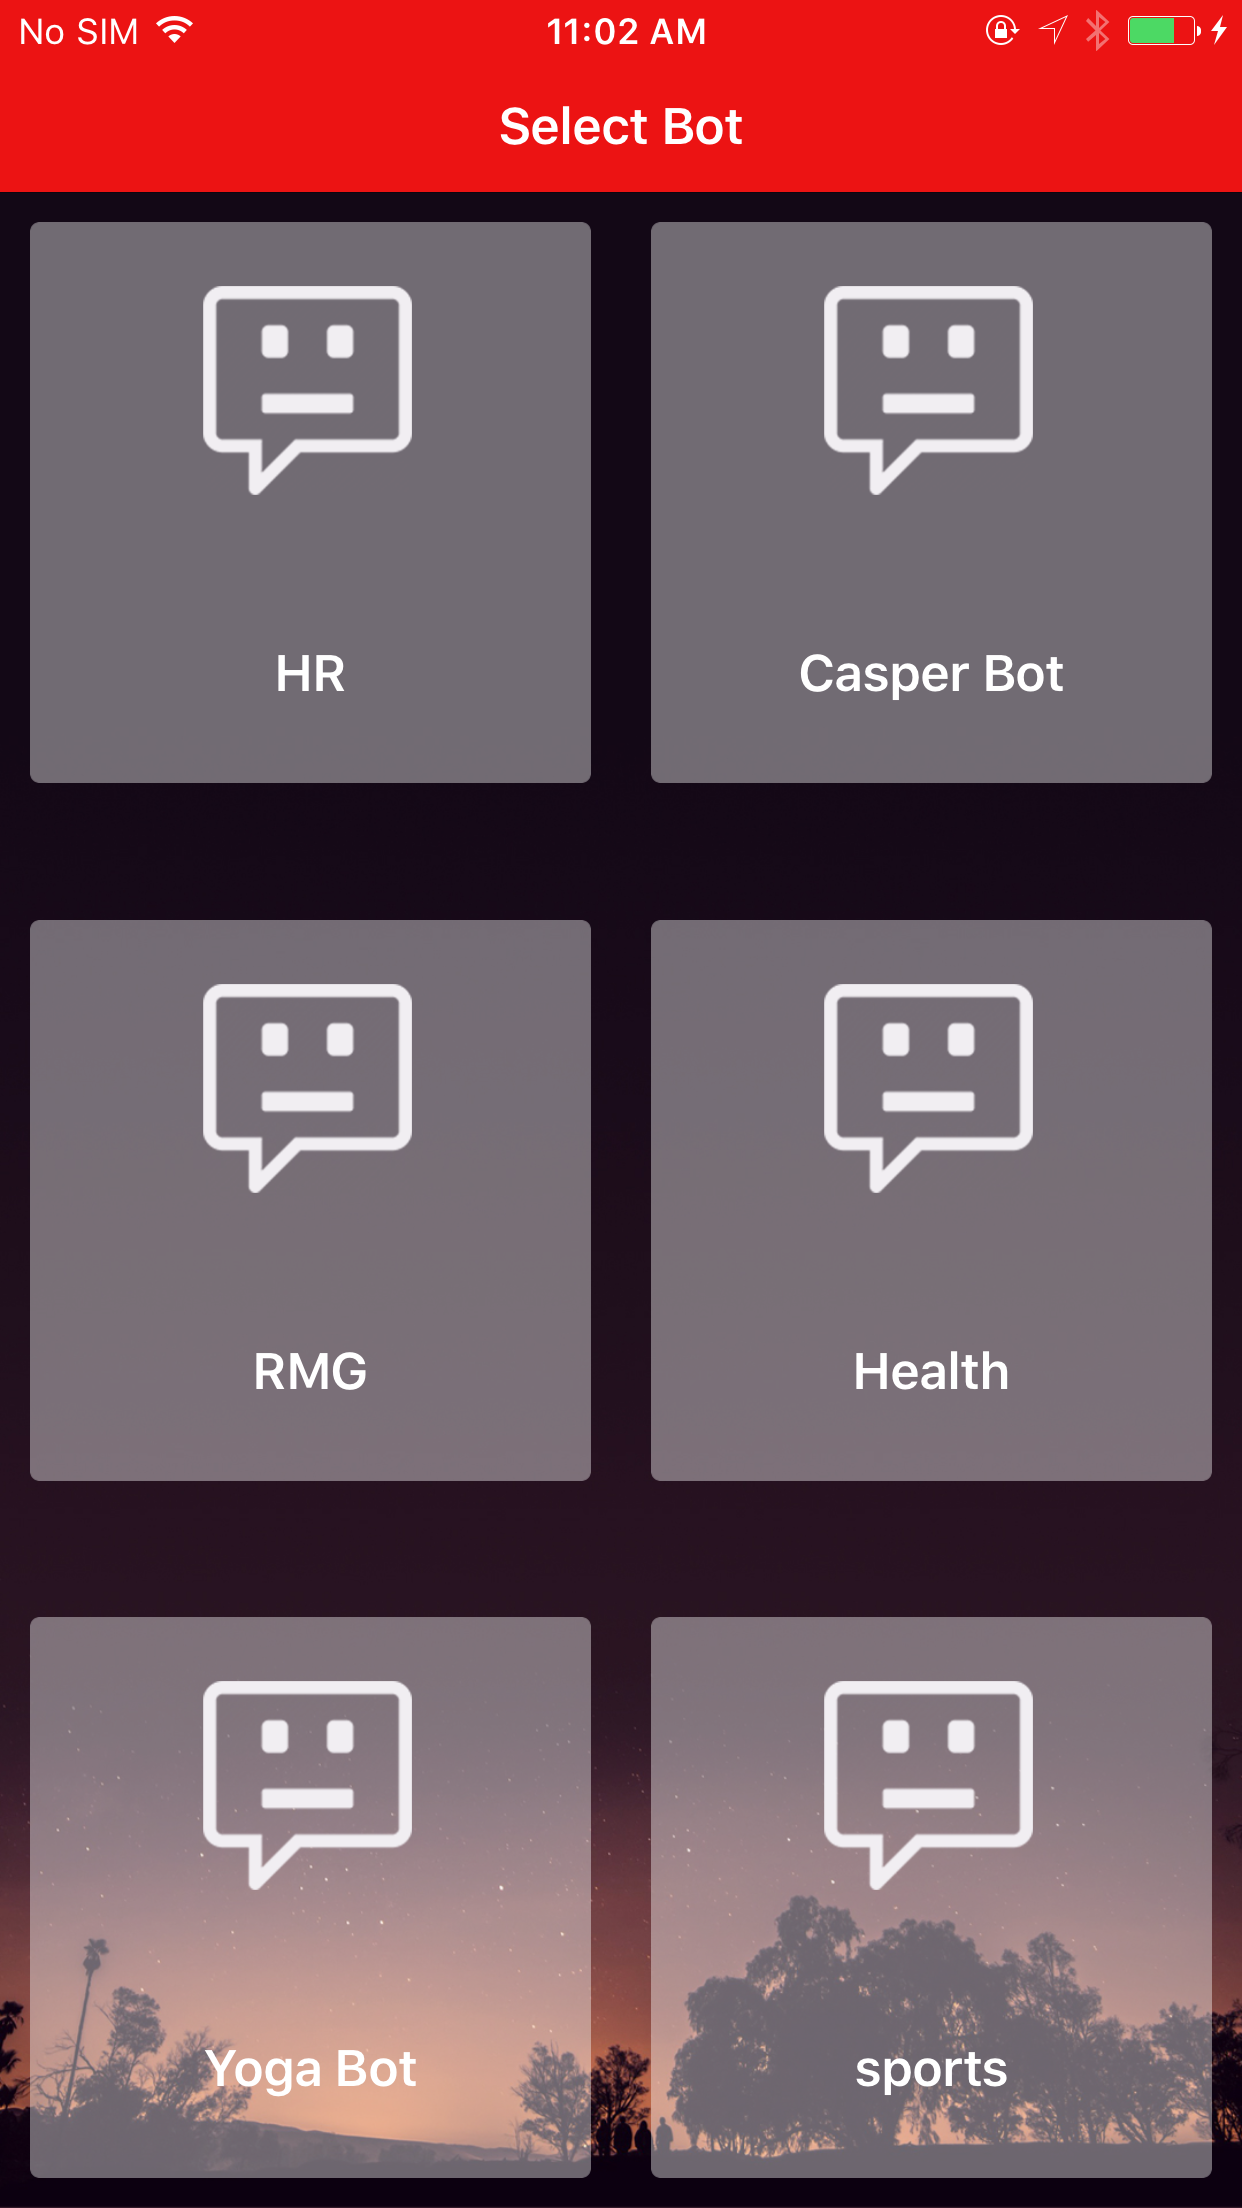
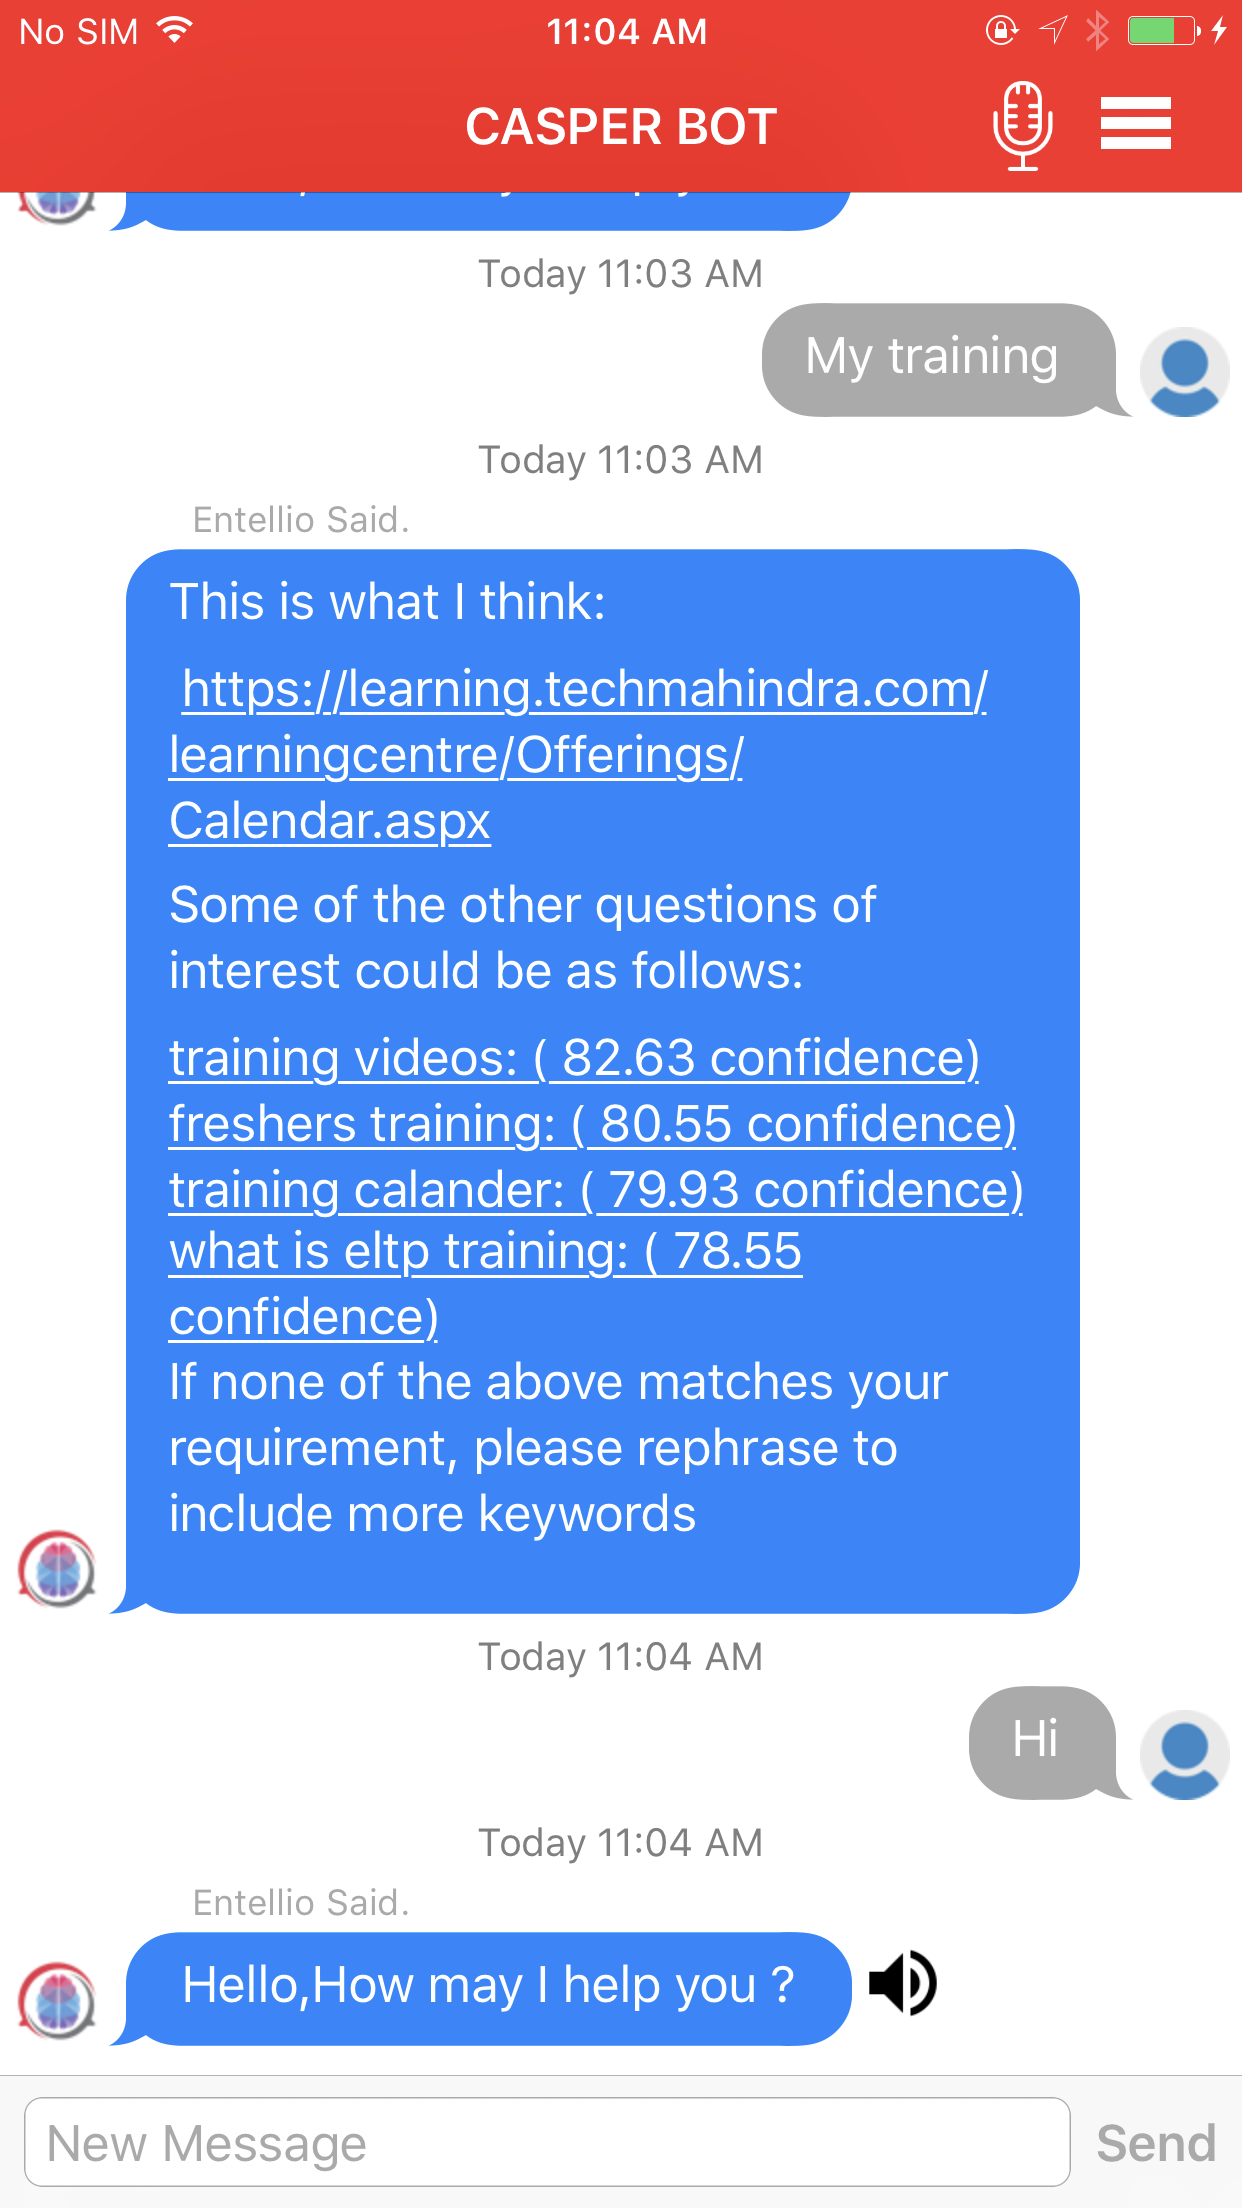
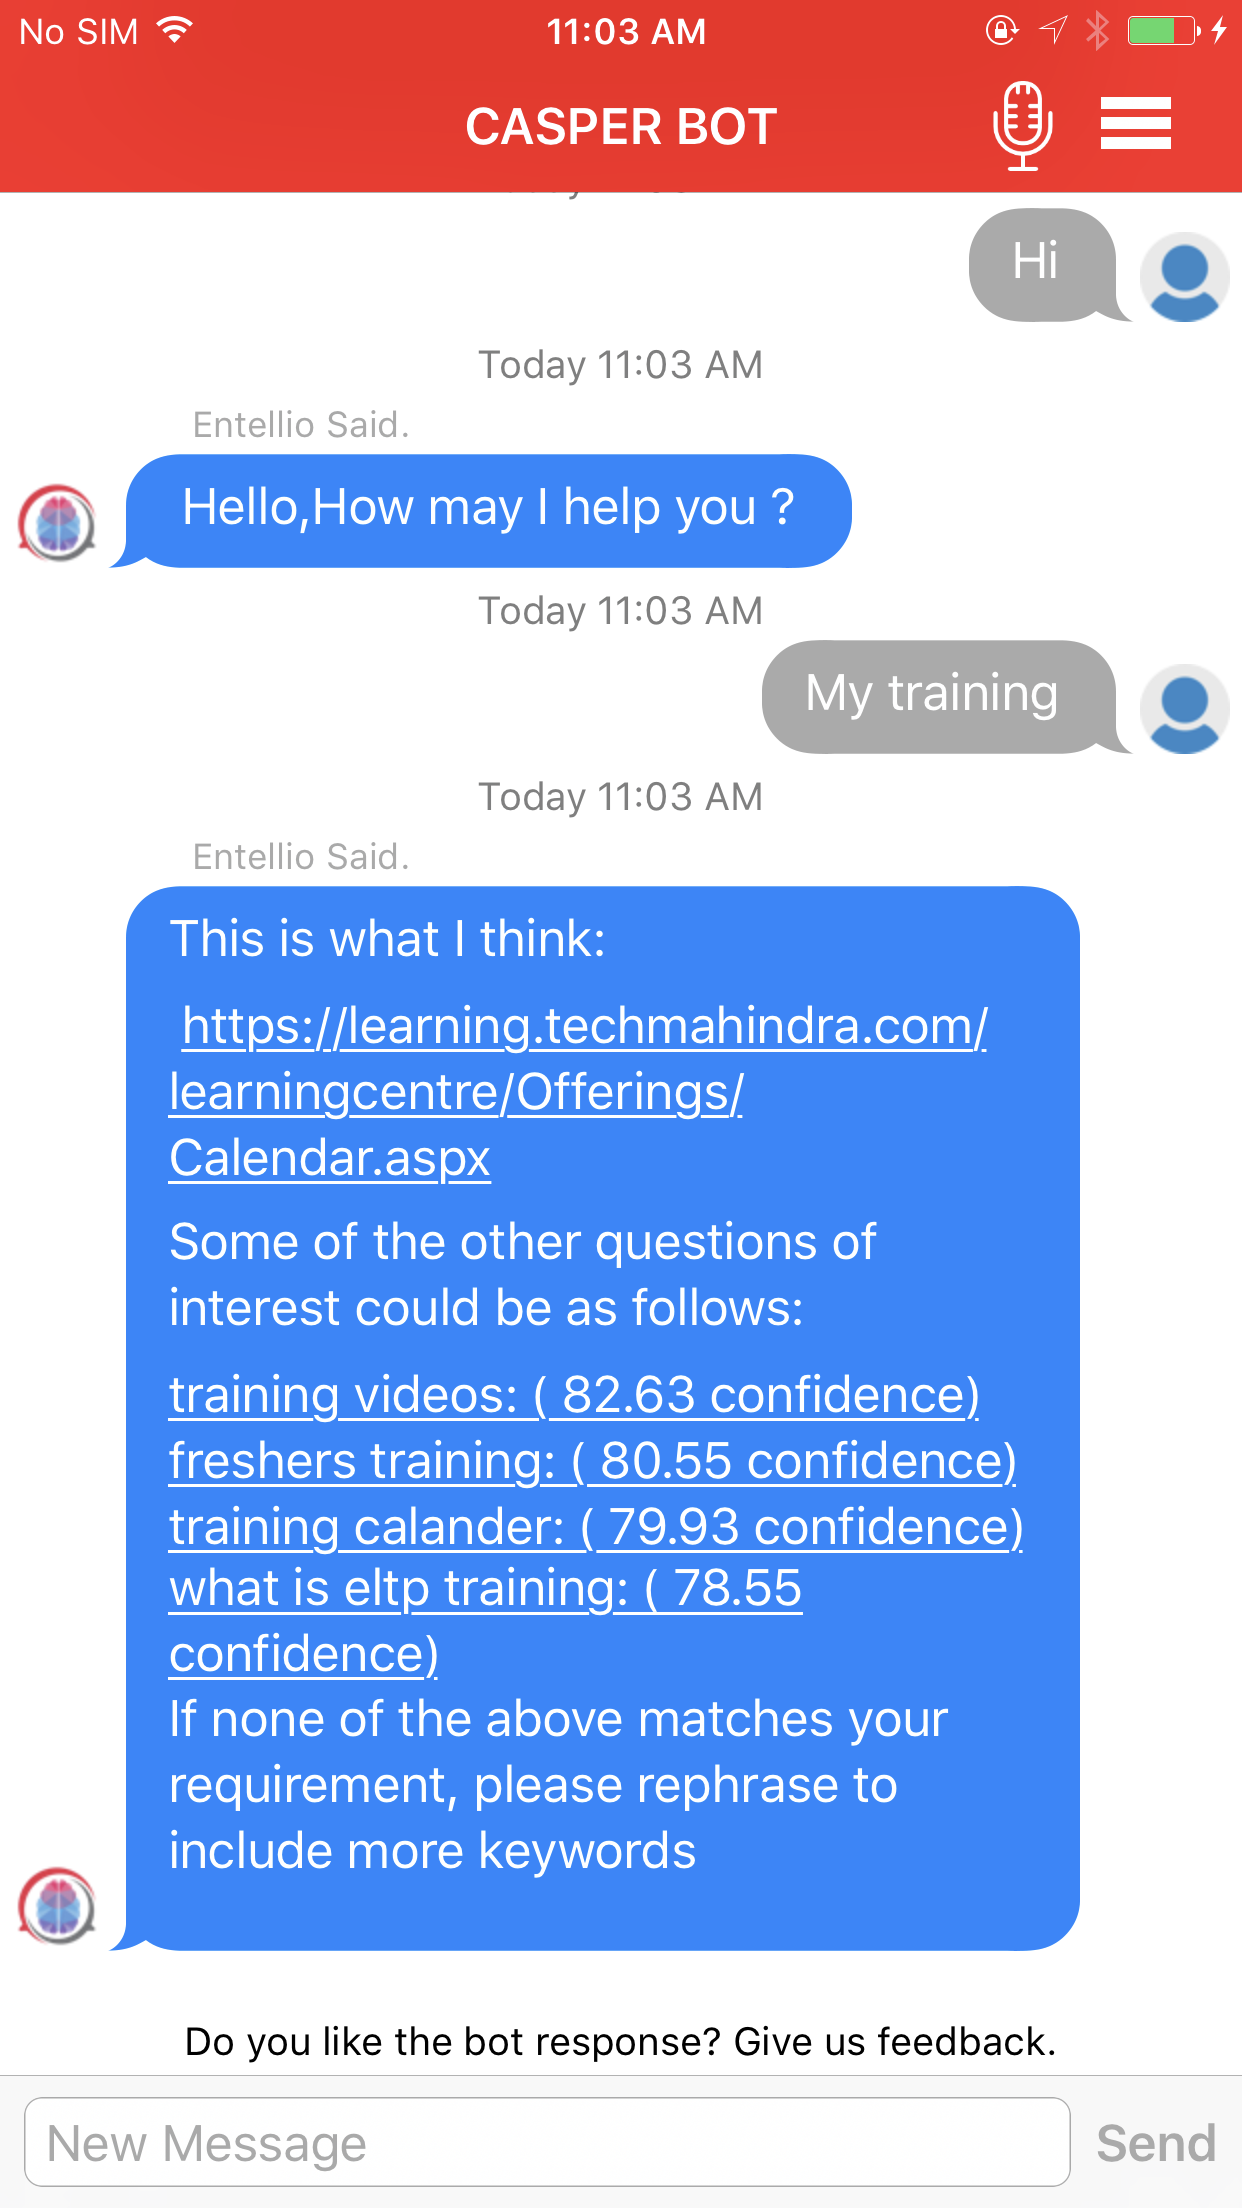
Screenshots
Getting Started for ios
Entellio SDK document
Guidelines to Integrate Entellio SDK to Existing Project
Framework is build on xcode 8.3.1 with swift 3.1.
Available for iOS 10.0 or above.
- Drag and Drop EnetllioSDK.framework into your project.
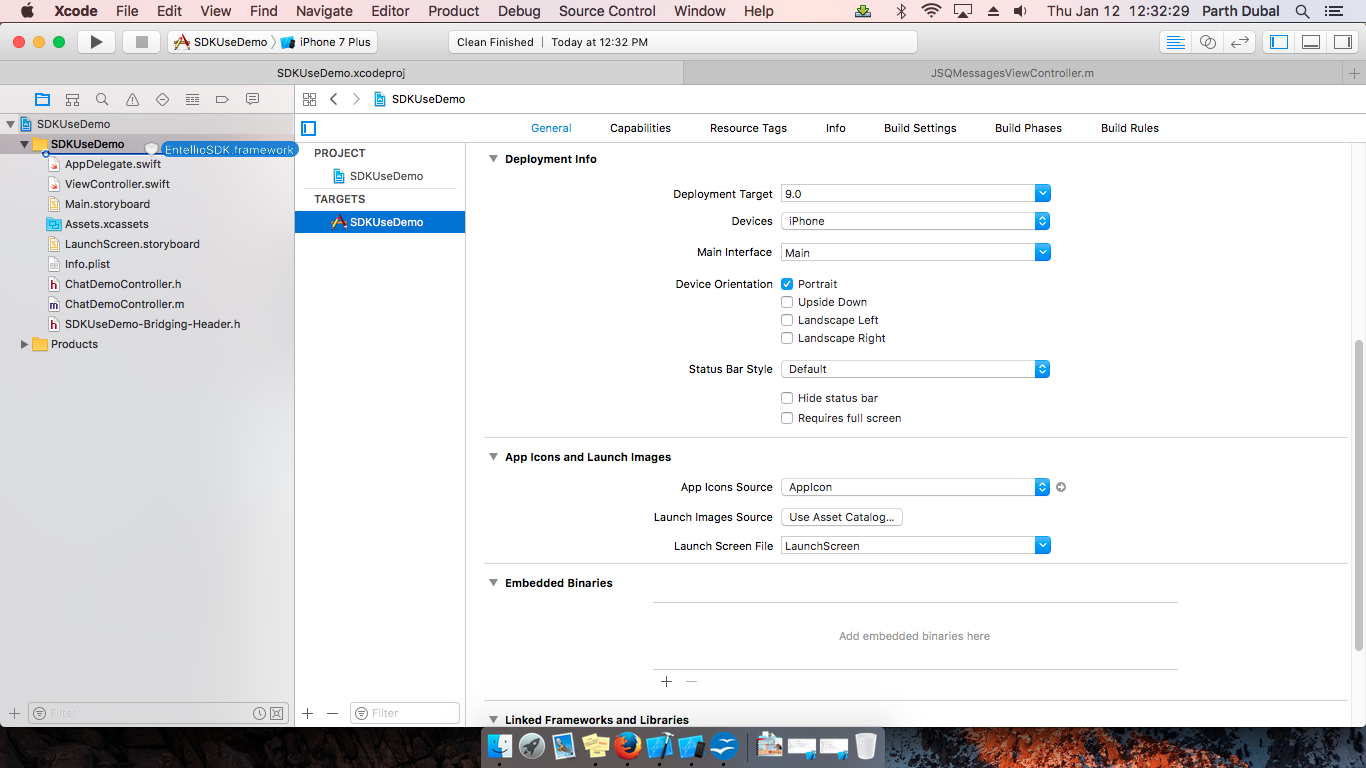
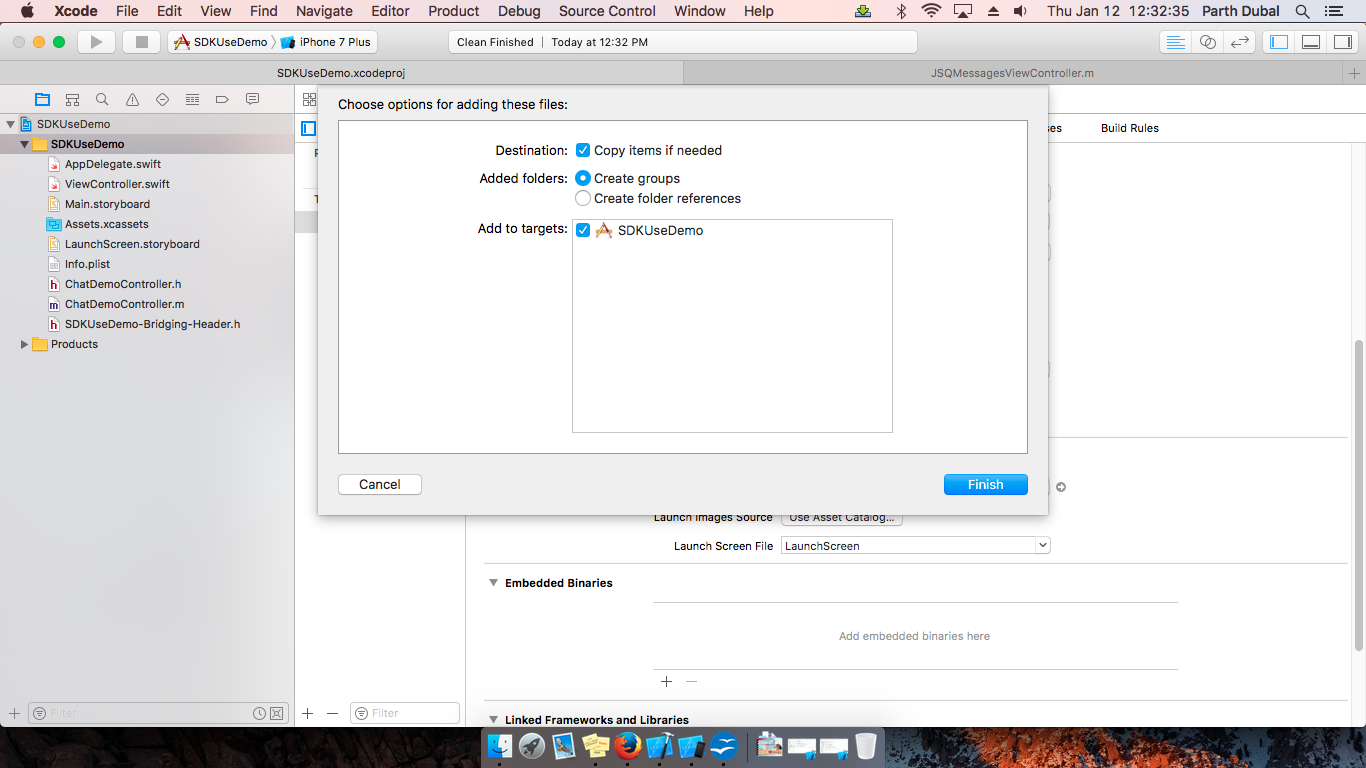
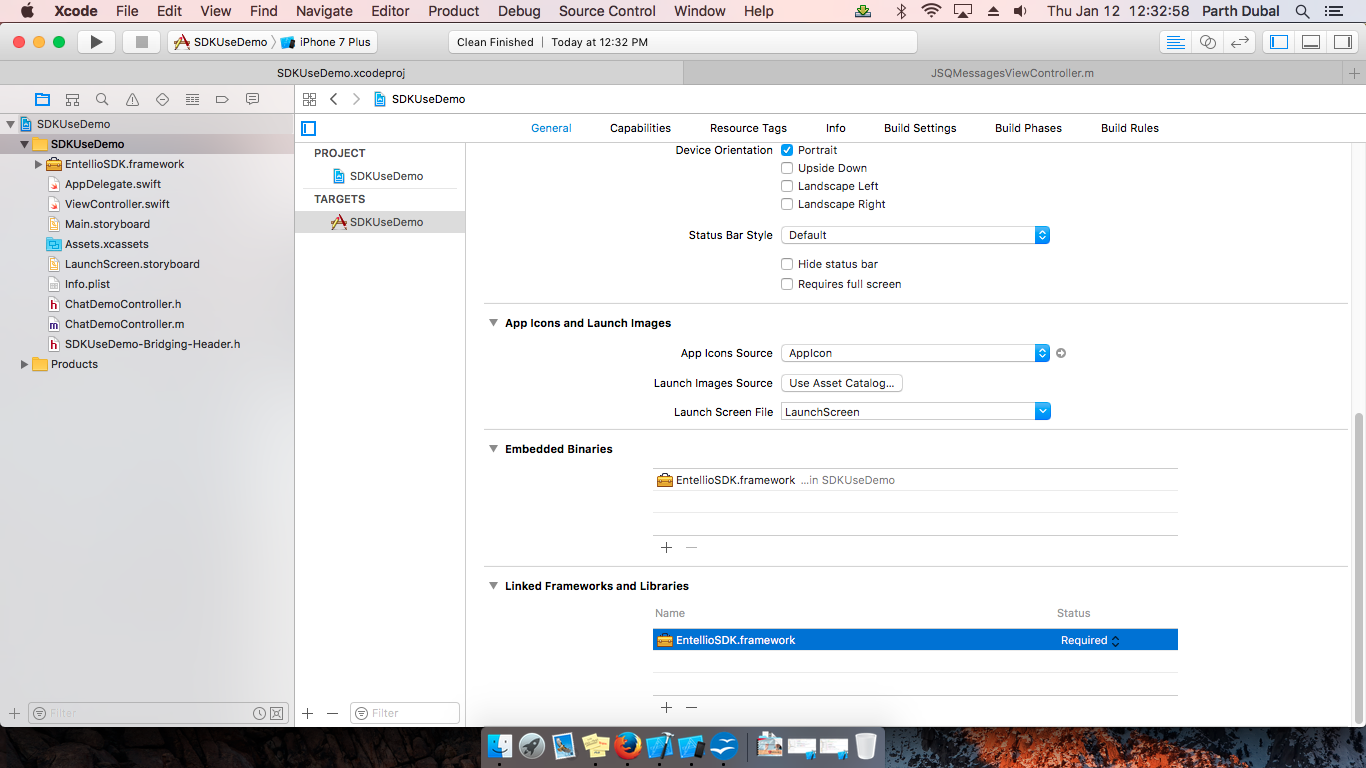
Go to Project setting > General tab >
- Add EnetllioSDK.framework in Embedded Binaries.

- You may remove one EnetllioSDK.framework from “Linked Frameworks and Libraries” if you see two EnetllioSDK.framework.
- Finally screen should look like below
Go to Project setting > Build Phases >
- Add following command in run script / add new run script.
    bash "${BUILT_PRODUCTS_DIR}/${FRAMEWORKS_FOLDER_PATH}/EntellioSDK.framework/
strip-frameworks.sh"
*Above script is used for building valid binaries for app store builds.
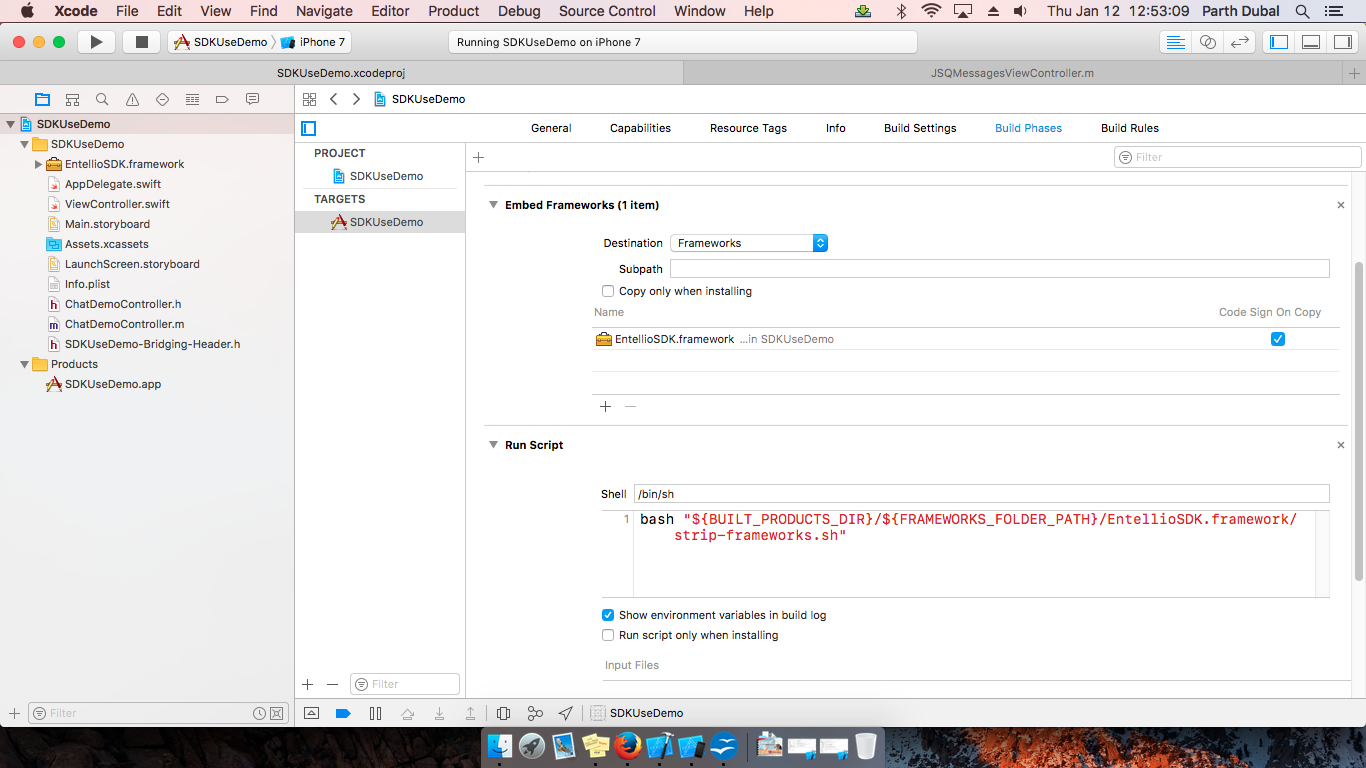
- Make sure you place Embeded Frameworks before Run Script.
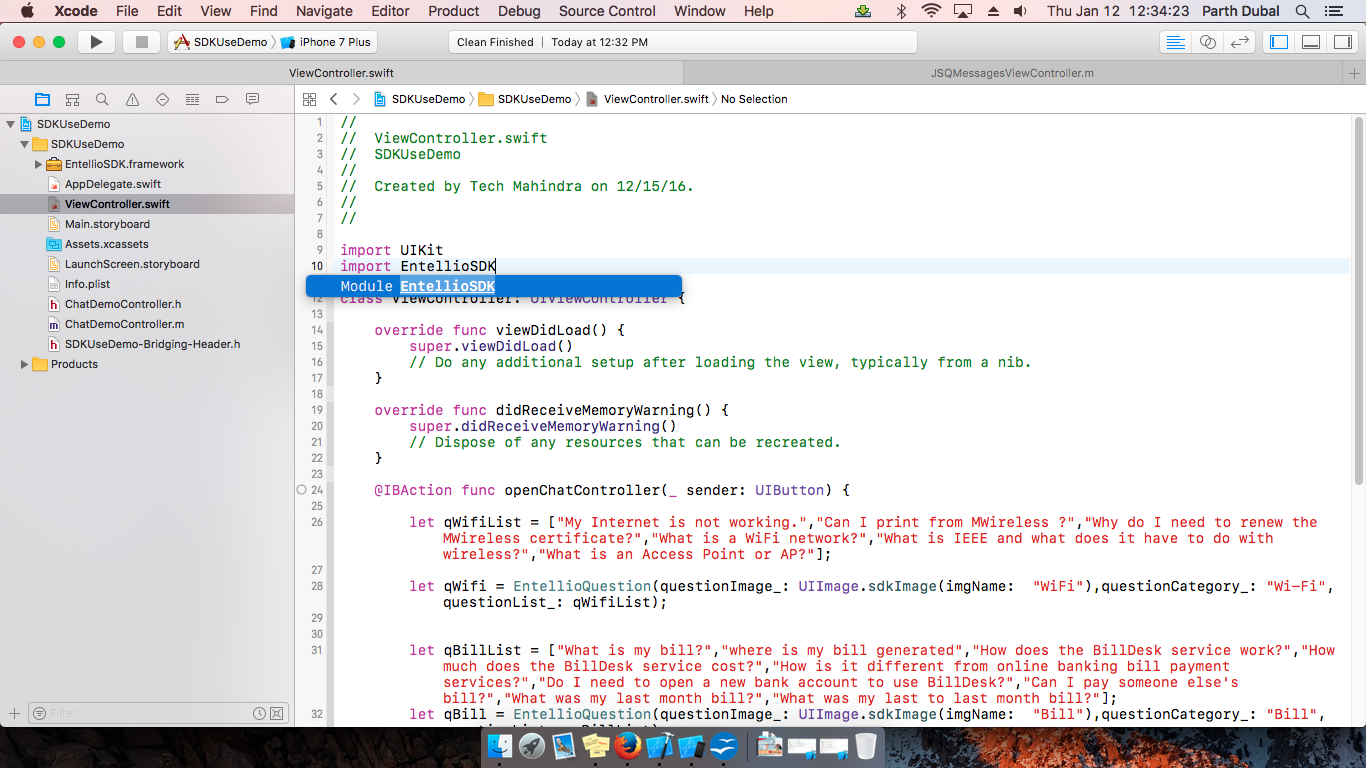
- You can use import statement to use SDK - “import EntellioSDK”
For Objective C Project
use below import statement in Objective-C files.
- #import <EntellioSDK/EntellioSDK.h>
- #import <EntellioSDK/EntellioSDK-Swift.h>
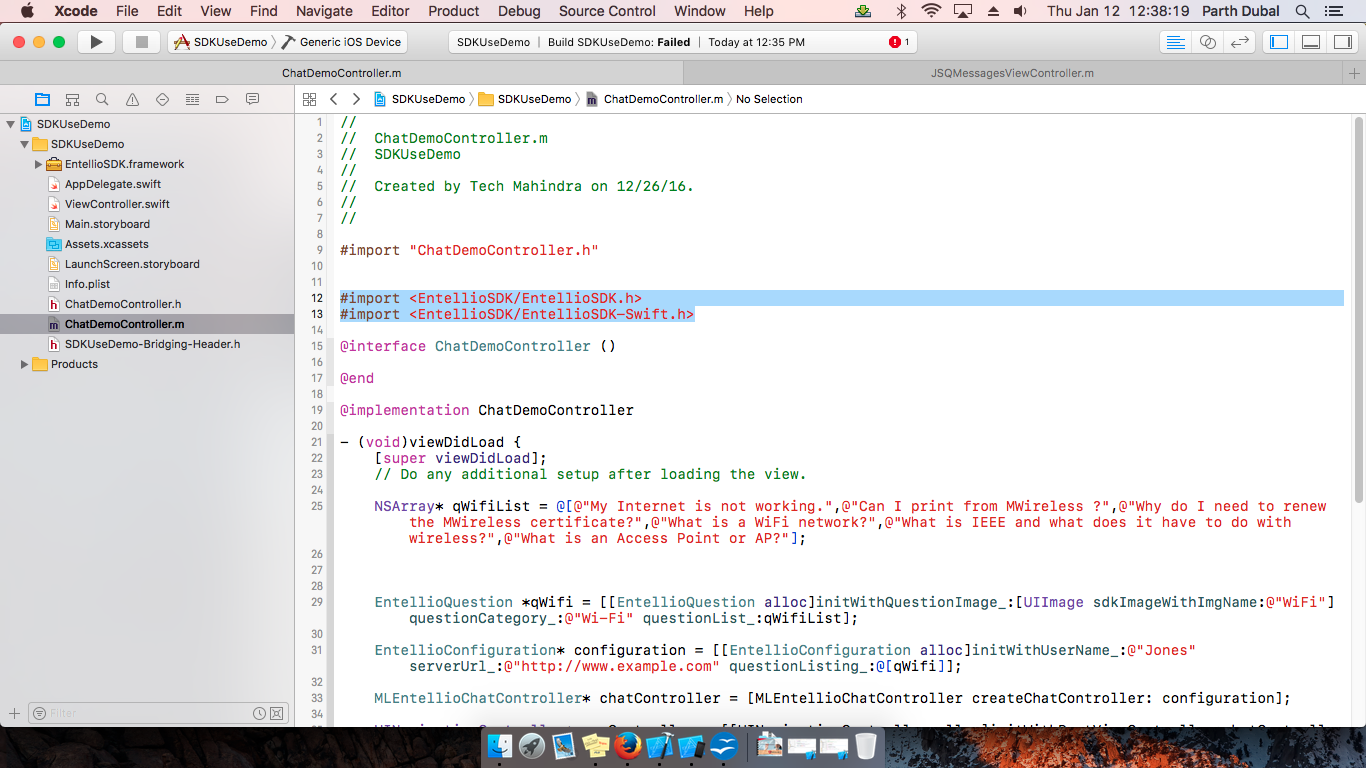
Below are main classes to use SDK
- EntellioCore
- EntellioConfiguration
- SDKAppTheme
EntellioCore required EntellioConfiguration. object with valid details.
EntellioConfiguration used to setup basic variable like username, server url.
SDKAppTheme use to customize chat window color. Create and assign SDKappTheme object to EmtellioConfiguration to customize chat window color.
Below is code snippet and usage:
You must set chat bot key to use SDK
EntellioCore.setBotListUsername(botUsername: "abhishek")
We have created one question category for “Wi-Fi” with sets of question and icon image.
let appTheme = SDKAppTheme();
        appTheme.incomingBubleColor = UIColor.black
        appTheme.outgoingBubleColor = UIColor.black
        appTheme.incomingTextColor  = UIColor.yellow
        appTheme.outgoingTextColor  = UIColor.yellow
Now we will use question category further in EntellioConfiguration
    let configuration = EntellioConfiguration(userName_: "Jones", serverUrl_:
 "http://www.example.com:");

    configuration.appTheme = appTheme
We have created configuration object user name and services url and sets of question category.
EntellioCore.sharedInstance().showEntellioChat(controller: window!.rootViewController!, entellioConfiguration: configuration)
Screenshots

Getting Started for Entellio Chat Services
Overview
Chatbot programs are designed to convincingly simulate how a human would behave as a conversational partner. Chatbots have plenty of usecases such as a virtual agent in call center, virtual tutor, virtual help agent in banks, retail shops etc.
CHAT Service
Introduction
Chat service is designed to simulate an interesting conversation with one or more human users via textual input. Entellio performs latent semantic analysis to understand if expected response is generic or personalized. For generic case, bot categorizes user input and matches pattern to AIMLs generated. Bot is ranked based on percentage match. For personalized case, bot first performs POS tagging using NLP. It then extracts morphological and lexical meaning within domain. API Service to call is then determined.
Chat Service provides query, displayname and feedback API.
Query
Prerequisite
You are required to be logged in using LDAP or another suitable authentication procedure.
URL parameters to Query Service
| Input Parameter | Description | Sample Input JSON |
|---|---|---|
| Chat | INPUT SENTENCE FROM USER TO ENTELLIO | {"Chat":"INPUT SENTENCE FROM USER TO ENTELLIO"} |
Sample Response
Status Code: 200 OK
Content-Type: text
Date: Thu, 16 Mar 2017 07:32:07 GMT
Server: WSGIServer/0.2 CPython/3.4.3
x-frame-options: SAMEORIGIN
HI Saket
Sample Code
Refer to link as under to use services from Android
Android
Refer to link as under to use services from IOS
IOS
BOT Ranks
| RANK | RESPONSE FORMAT |
|---|---|
| RANK 1 | “Actual Response as it is uploaded in the database” |
| RANK 2 | “Following is the best match” Actual Response |
| RANK 3 | “Do you mean the following?” Suggestions |
| RANK 4 | ”No correct match found” Suggestions |
| RANK 5 | I am not sure what you mean by that. Could you elaborate? |
Displayname
‘Displayname’ services fetches display name from session
Feedback
‘Feedback’ service fetches feedback response from session
Feedback is used to send additional information to user after chat response. This can be used to send dynamic additional options to user.
E.g. Feedback service sends response desired by you when user gets same response thrice successively.